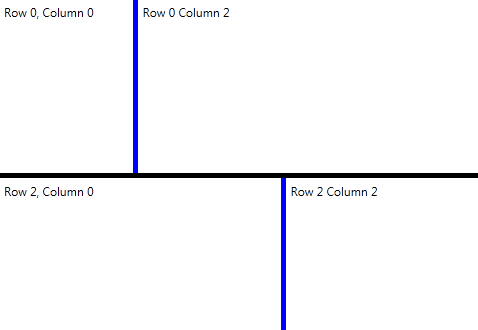
Here is a quick sample showing how it is possible to create a flexible resizeable layout in WPF with a GridSplitter. Here we see how you can change the size of panes in a vertical and horizontal direction.

And the Xaml:
<Page xmlns="http://schemas.microsoft.com/winfx/2006/xaml/presentation" xmlns:x="http://schemas.microsoft.com/winfx/2006/xaml">
   <Grid>
      <Grid.RowDefinitions>
         <RowDefinition Height="*"/>
         <RowDefinition Height="Auto"/>
         <RowDefinition Height="*"/>
      </Grid.RowDefinitions>
      <Grid Grid.Row="0">
         <Grid.ColumnDefinitions>
            <ColumnDefinition Width="Auto"/>
            <ColumnDefinition/>
         </Grid.ColumnDefinitions>
         <Label Grid.Column="0">Row 0, Column 0</Label>
         <GridSplitter
            Width="5"
            Grid.Column="0"
            Background="Blue"
            ShowsPreview="True"/>
         <Label Grid.Column="2">Row 0 Column 2</Label>
      </Grid>
      <GridSplitter
         Height="5"
         Grid.ColumnSpan="3"
         Grid.Row="1"
         HorizontalAlignment="Stretch"
         VerticalAlignment="Stretch"
         Background="Black"
         ResizeDirection="Rows"
         ShowsPreview="true"/>
      <Grid Grid.Row="2">
         <Grid.ColumnDefinitions>
            <ColumnDefinition Width="Auto"/>
            <ColumnDefinition/>
         </Grid.ColumnDefinitions>
         <Label Grid.Column="0">Row 2, Column 0</Label>
         <GridSplitter
            Width="5"
            Grid.Column="0"
            Background="Blue"
            ShowsPreview="True"/>
         <Label Grid.Column="2">Row 2 Column 2</Label>
      </Grid>
   </Grid>
</Page>


